
Click on images for a larger view. Click back on your browser to return.


PHOTO BORDERS
Here´s a quick and easy way to get a border around your photos.
MAKE A FONT BROWSER IN PHOTOSHOP
Do you ever find it difficult to choose exactly the right font for your layout because the preview is so small in Photoshop? Here´s a quick and easy way to preview your fonts.
1. First type some letters in any font.

2. Then highlight them by dragging your mouse across them.

3. Then highlight the current font in the option bar.
4. Now use the up and down arrow keys to see the font change before your very eyes!

Wasn´t that easy?
Another advantage is that not only can you choose any size of font for your preview but you can also type any text you like to see how it´ll look on your page.
I hope this simple tutorial will help to take the hassle out of choosing the perfect font for your layouts.
Here´s a quick and easy way to get a border around your photos.
1. Open the photo and set the background colour to anything you like. I've chosen the traditional white for this example.

2. Go to Image – Canvas Size…

3….then check Relative and add the value you wish for your border. I've chosen the relatively small value of 0.2 to add a border of 1/5 of an inch to my photo. Experiment until you find something that suits you.

4. And there it is! You´ve given your photo a perfectly proportioned border with very little effort.

You can now simply copy and paste it into your layout, add a drop shadow to give it depth, curl a corner, add a bevel, revolve it a little or anything else you like.
Anyone who´s ever taken a photo of the sea will know how difficult it is to get the horizon 100% straight and what a problem it can be to correct a crooked horizon. You can try to straighten it by guessing and rotating it but that´s not always successful. Here´s a really quick and simple way to take the guesswork out of this.
1. First of all, open the photo you wish to correct. At this point, if you want to use it for a scrapbook page, you may wish to alter the size and resolution. After you´ve done that, right click on the background layer in the layers palette and then choose Layer from Background.


2. Next you´ll need to give yourself some space around your photo so click on the menu item Image then Canvas Size, make sure that Relative is checked and add 1 inch to both the width and the height.


3. Next, choose the measure tool which is under the eye dropper in the Tool Palette.


4. Now drag the measure tool from one side of the horizon to the other.


5. Go back up to Image then Rotate Canvas and Arbitrary. You´ll be able to see exactly how out of kilter your photo is.


6. Of course once the horizon has been straightened you're left with a tilted photo. Go back to the Tool Palette and choose the rectangular marquee tool.


7. Make a selection around your photo.


8. Then back up to Image and then Crop. Your photo is a little smaller now but at least your horizon is perfectly straight.


This tip is also useful for straightening scanned photos which you haven´t aligned properly. In that case, use the measure tool along the entire length of the top border of the photo.
Just one last tip. When you save your altered photo, don't be tempted to simply replace the original jpg with your improved version. Give it a different name or your photo will lose quality. There´s a reason for this but that´s an entirely different kind of tutorial!
 3. Change the Blend Mode to Color.
 4. Click on the colour next to Blend Mode/Color and then, moving the
mouse until it hovers over the foreground colour on the tool bar and changes to the
color picker, use it change the colour to brown.
4. Click on the colour next to Blend Mode/Color and then, moving the
mouse until it hovers over the foreground colour on the tool bar and changes to the
color picker, use it change the colour to brown.

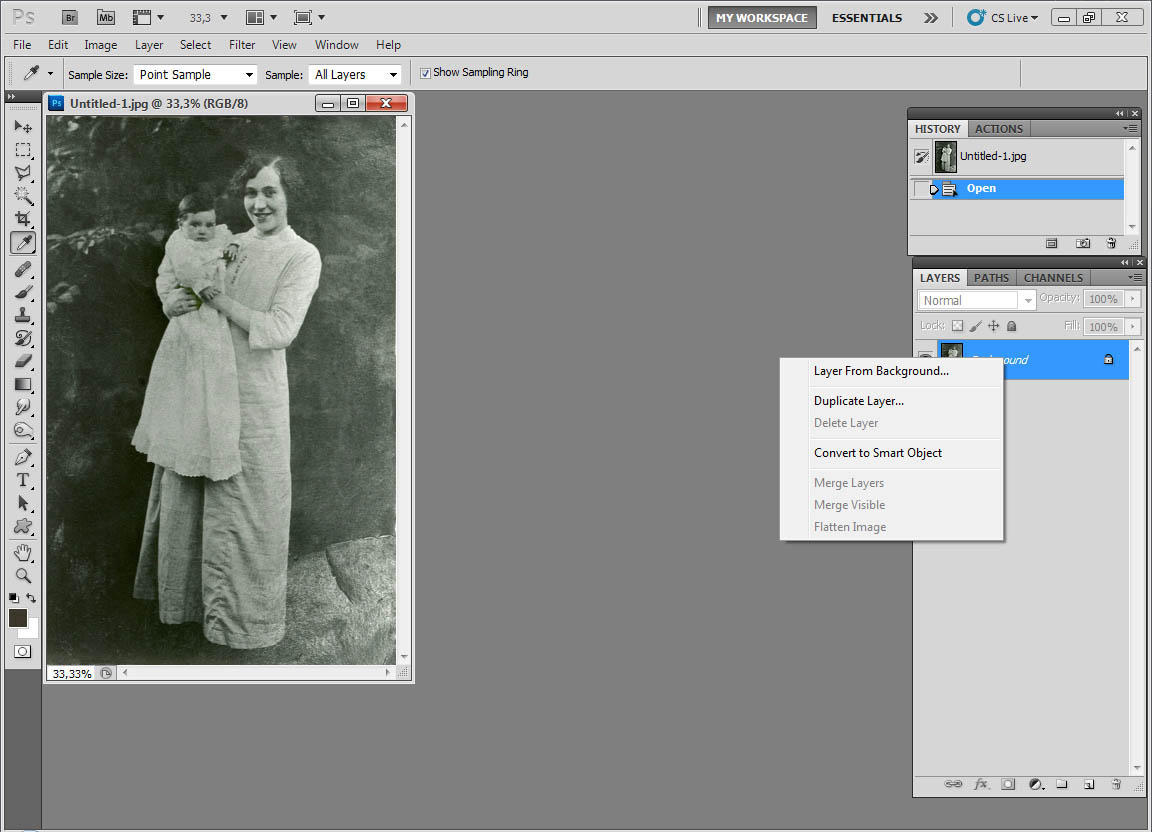
HOW TO CHANGE A BLACK AND
WHITE PHOTO TO SEPIA
1. Open your photo in Photoshop. Right
click on Background and choose Layer From Background. Set your
foreground colour to a dark brown of your choice. I used 3d372b but
you can experiment until you find a shade of brown which suits your
photo.

2. Click on fx and choose Color
Overlay.
5. Click OK twice.


thanks for these! I'm learning, very slowly, to use PhotoShop, and I've been doing the photo frames the hard way! LOL
ReplyDelete