
I´ve often said that an important part
of photo restoration is knowing when to stop because if you overwork
a photo you can lose as much as you gain. By that I mean you can
smooth it out, clean it up and eradicate all its major faults and in the
process simply ensure that it takes on a completely artificial
character.
With the following photo knowing when
to stop was not a major concern. Well, not for many years because it
was one of these projects I kept attempting and almost immediately
gave up in frustration. I just knew that it wasn´t the right time to
start.
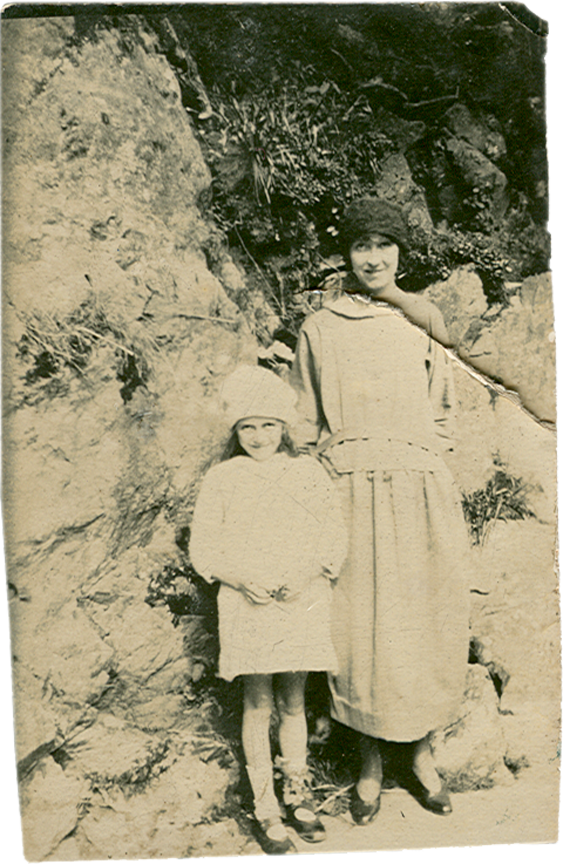
See what I mean? For many years I just
didn´t have the necessary expertise to tackle something so
horrendous. For a start that deep diagonal crease was totally
intimidating and the longer I looked at it the less confidence I had
that I´d ever be able to remove it. I finally put the photo away and
forgot about it. In the meantime I had enough old damaged photos to
keep me occupied. Just recently I was looking through all my previous
restoration work and realised that many of my old family photos had
been just as badly treated and yet I´d somehow managed to restore
them, if not to perfection at least to a reasonable condition so I
dug it out again and had another look at it. First of all I
desaturated it. I suppose that wasn´t really necessary but I find it
far easier to repair faults in a black and white image.

After that I straightened the edges and
then used a combination of the clone tool and the healing brush tool
to remove the crease. I know that this sounds easy but, believe me,
it wasn´t! It took a lot of trial and error before I was happy with
the result.

The next step was to conceal the black
edges but that was easily done using the clone tool which I also used
on the missing part of the shoe. Next I restored the photo to its
original sepia. Well, not quite its original which looked rather too
yellow to me. (See Tutorials) I also altered the shadows and the
highlights.

After that I cleaned up that messy
looking sock using the clone tool. The photo still looked rather flat
so I also deepened the contrast.

In my final version I decided to use a
darker brown overlay. I then increased the contrast using Curves
which brought out the detail. This also had the effect of increasing
the visibility of the scratches.

Did I just say that was my final
version? Well, it may be but I couldn´t resist trying out an even
darker overlay to give it more depth.

As you can see from the above, it took
a lot of trial and error to restore this old photo. I´m still not
entirely happy with it but at least it looks a lot better than the
original. I suppose I could remove those scratches but, as I said
before, you have to know not only when it´s time to start but also
when to stop!


WOW! That's impressive! Adding the depth pulled out so much more detail in the child. I'd leave the scratches. They're slight and add character to what the viewer already knows is an old photo. Great job as always.
ReplyDeleteVery nicely done, Helen! The greater depth looks as important and the crease removal. Wonderful how much detail can be restored. Fascinating dress too.
ReplyDeleteWow is right. I have tried my hand at photo restoration and have stopped and started over many times. I will remember the part where you changed the photo to black and white while working on it...great tip. Definitely like the addition of the last overlay which does bring out much more detail. A treasure now restored.
ReplyDeleteI have tried cleaning up, and tossed (the results) A LOT of old pictures, but I think I will start again. I too would leave the slight scratches. It gives character, and shows that the pictures have been handled in the time they've been around.... I will have to try the overlays though, because I always just put them back with a sepia layer, but the result always looked washed out.
ReplyDelete