just an old-fashioned girl

Hello and welcome. I'm glad you dropped by. If you´re looking for something a little nostalgic of bygone eras with a timeless elegance and a little modern twist – in other words, something slightly “retro” – then you should feel right at home here in my shabby chic room. Month by month, there will always be something new to see so I hope you´ll enjoy your stay and come back again soon.

Showing posts with label digital. Show all posts

Sunday, March 20, 2011

Aversion To Green

With St. Patrick´s Day in the recent past maybe now´s not the best time to admit that I don´t like green. I´m not sure why this is, maybe because there are so many shades of it which make me with my Nordic complexion look - to quote an expression of my mother´s - "like death warmed up." My husband, on the other hand, looks great even in bottle green, a particularly unpleasant colour to me, but then he has green eyes which probably explains it. Brown is another colour that´s never appealed to me. Ditto the quote from my mother. Again, it suits my husband which is annoying because it means I can never borrow his sweaters. So, given my aversion to these colours, isn´t it strange that I should choose to create a green and brown kit? Well, the answer is I didn´t. Choose, I mean. It just sort of happened. And this isn´t the first time either. I can think of several green/brown kits in my collection including my most recent as you can see for yourself.

This is a kit that started off grungy brown and then took on a life of its own when it told me it needed something to relieve the drabness of all those earth tones. The obvious choice was, needless to say, green. I´ve also livened it up with a little bling so that what started out rather grungy has ended up a lot more elegant than I´d originally intended! I´ll post the previews soon and you can judge for yourself.

The above photo is one of many found in an attic by my cousin, Neville, and shows himself and his mother in what is obviously a studio portrait. Judging by that pout he was none too pleased about it and there only under protest. Maybe the photographer should have captured his interest by saying, "Watch the birdie" as my dad always did before snapping us children. I´ve added the "birdie" but far too late to change that petulant pout.

This was, and still is, a very spotty photo though it was a lot worse when I first got it. It still needs a lot of painstaking work with the PS healing brush/clone stamp tools though in this small format its most glaring defects aren´t so apparent.

Sunday, February 20, 2011

Summer Past

Here are the previews of Summer Past. I´ve posted them here rather than among my other kit previews because the kit won´t be released until either "summer future" or I find a new scrapping home, whichever comes first. I hope you´ll like it as much as I enjoyed creating it but it´s time to move on and I´m currently working on something entirely different. I´ll show you a sample soon.

Wednesday, February 16, 2011

Capturing Spring

Here on the Dutch/German border the temperature is gradually rising, the frost and snow have gone and the evenings are drawing out. For each of us the signs of reawakening life are different. For Wordsworth it was the sight of "a host of golden daffodils". For me it´s a pool of white snowdrops. This is snowdrop country and they´ve suddenly sprung up everywhere, in their hundreds in my garden and in their hundreds of thousands in the surrounding countryside. They lie in little puddles under trees among last year´s dead leaves and in large lakes in grassy fields and along the river bank and to me they´re the harbinger of my favourite season. For me summer here is too hot and humid, Autumn the sad dying back before the icy chill of Winter but Spring is a fresh green time of new beginnings and I wish I could capture and keep it.

(click for a larger view)

If you´d like the floral gold and glass frame I´ve used to capture my snowdrops, you´ll find it HERE

Thursday, February 10, 2011

Have A Heart!

After I´d posted that simple tutorial yesterday, it occurred to me that your own PS font browser would be especially useful for previewing dingbat fonts as the PS preview is of even less use for them than it is for viewing conventional fonts. If you take the time to spell out the entire alphabet, you´ll be able to see all the dingbats on one page. When I did that myself I discovered lots of useful dingbats which I´d never have found by the usual trial and error method because it simply takes far too long to try out one after the other until I´ve found something I can use. I´ve been making gold and glitter styles just for fun recently and had been considering creating a Valentine kit using them. Well, I found the ideal dingbats to practise on, namely 2Peas GGs Love Me. I had so much fun trying out my styles on them I got quite carried away and ended up with a whole pageful of glittering Valentine motifs. It seemed such a shame to delete them I thought I´d offer them as an early Valentine Day gift. So, if you like them....have a heart. In fact, have 14 hearts! You´ll find them HERE with love from me to you.


Almost forgot to say that these elements are all on one page so you´ll have to cut them out yourself but, don´t worry, I´ve left plenty of space between them so it shouldn´t be difficult.

Saturday, February 5, 2011

Tea With The Bedouins

This is another of the photos from our holiday in Tunisia which I converted from a slide. It needed quite a lot of restoration work but it was worth it as I´m unlikely to get another chance to wear a Bedouin wedding costume or to drink tea with these hospitable people, so this will be a memory to cherish. I think the photo still requires a little more editing, especially to bring out the green of the tattoos on the older wife´s face without affecting the rest of the photo. I´ll need to experiment with that as I´ve no idea how to do it.
Tea Tunisian style is unusual to say the least. On this occasion the water was boiled in a can over an open fire - I had to extract the tea set from another photo. A handful of tea is put into the teapot followed by a handful of sugar then the water is added and everything is mixed thoroughly and allowed to infuse for several minutes. The addition of the sugar puzzled me at first until I discovered that no saucers or tea spoons are provided and, since it´s assumed that everyone likes their tea strong and sweet, it seems quite practical to put the sugar directly into the teapot. As you can imagine, the resultant brew is very sweet indeed and an acquired taste for anyone who doesn´t have a sweet tooth! I do, so I enjoyed it and, anyway, making tea this way is no more eccentric than adding milk or lemon to it. I´d say that asking for milk wouldn´t only have been rude but might also have presented a problem since the only animal in sight was Fortuna, the camel we arrived on, and supermarkets are few and far between in the desert...

(click to enlarge)

I used quite a few gold elements from Summer Past to reflect all the gold jewellery adorning the three of us, and I recoloured a floral background to suit. I´ll show a preview of the kit just as soon as I´ve finished converting and editing my slides.
Almost forgot...no prizes for guessing which of the ladies is me.

Tuesday, January 25, 2011

From Slides To Photos

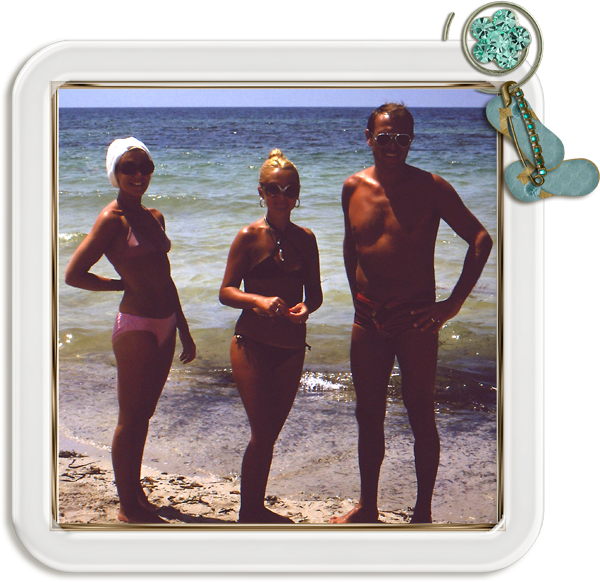
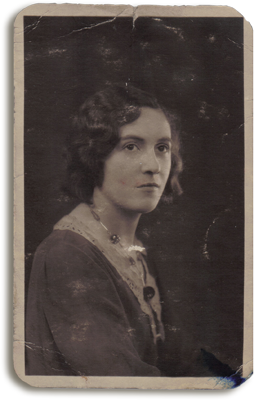
For years all the slides my husband made during a wonderful holiday in Tunisia lay forgotten in the attic until the slide scanner I got for Christmas encouraged me to bring them down, dust them off and convert them to photos. Said like that it sounds easy, doesn´t it? Believe me, it wasn´t! What looked like tiny blemishes and scratches, once converted to a 70 inch photo, were simply enormous and the very prospect of editing out all those monstrous flaws was so daunting I almost gave up before I´d started. In fact it was actually a little easier than I´d imagined as the very size of the photos was in my favour because I soon discovered that the larger the blemish the easier it is to remove. I chose one of the worst to practise on as it was such a good example of what a photo shouldn´t be that it gave me the chance to try out a variety of Photoshop´s editing tools. Here it is warts and all, though in this small format only the largest blemishes are visible.


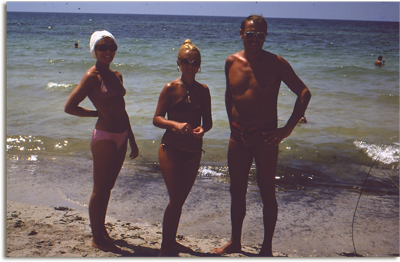
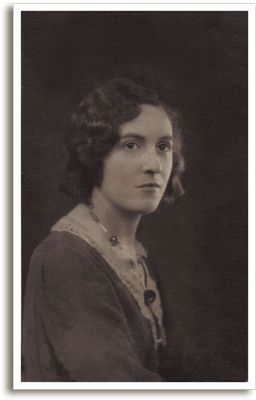
First I used the Spot Healing Brush to remove all the blotches and freckles. Luckily they were mostly in the background as I´d rather leave the reconstruction of faces to a cosmetic surgeon. There were too many distracting odd bodies floating around in the sea so I ruthlessly eliminated them using the Clone Stamp Tool which I also used on that huge scratch on the right. Later I regretted having spent so much time on that. You´ll see why on the finished photo. Then I altered the brightness/contrast and after that the only editing left was to straighten up the horizon to prevent the sea from spilling off onto the page. That was really easy - you´ll find a simple tutorial 
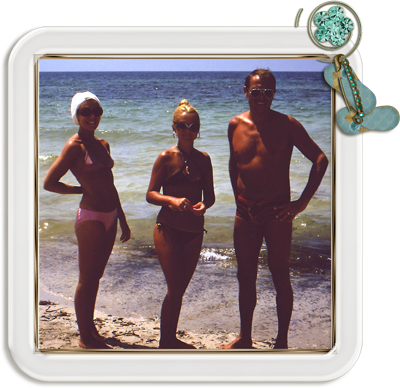
HERE - and my only regret was that it also entailed amputating even more of our feet than in the original slide. Still, no pain, no gain. After that the proportions of the photo didn´t look quite right so I trimmed off a fair bit at each side until it was almost square. Here´s the result...

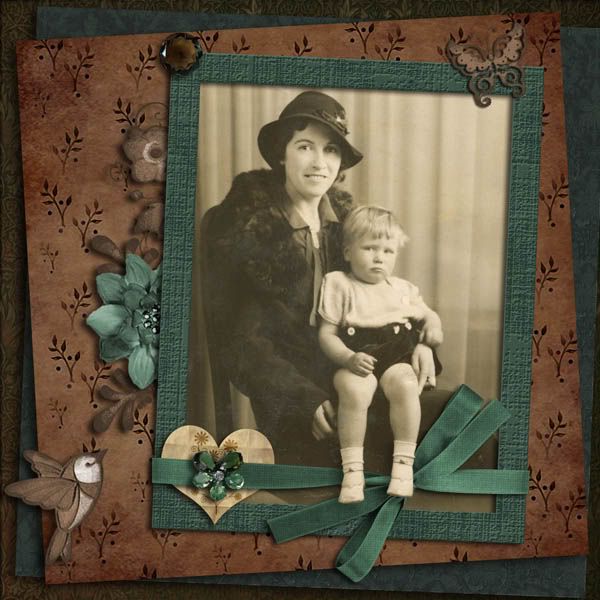
I used a couple of frames from Flight Of Fancy and held them together with a jewelled clip from the kit. Then I made a pair of flip flops from 2 background papers and attached them with the gold safety pin. You can see a preview of the kit HERE and, if you like, you can also pick up a little gift or two.
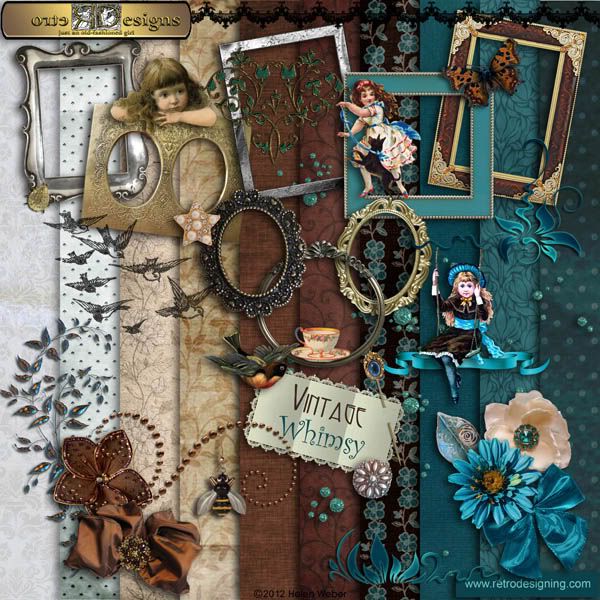
Sunday, January 16, 2011

Desert Beauty

While we were on holiday in Tunisia we hired a local man to take us on a trek through the desert on his camel. When we stopped to take photos we were invited to tea by a Bedouin family consisting of an elderly man and his two wives. The photo shows the younger of the two who had fun dressing me up in her wedding finery. In fact the out of focus part of this photo is one of several long gold chains which were attached to the headdress I was wearing. I´ve got to show you the photo of us three ladies together sometime so that you can guess which one is me! That shouldn´t be too difficult as the older wife had green facial tattoos. I still haven´t plucked up the courage to have that done...


I created this page using Summer Past, the new kit I´ve been working on recently. I hope I´ve done this desert beauty justice.

Saturday, January 8, 2011

Creating A Cameo

This 1930s studio portrait of my aunt, as you can see from the original below, was in very bad condition when I got it and it took quite some time to restore.
This is what I´ve done so far. It still requires a little tweaking but it´s a lot better than it was. The easiest part was replacing the damaged border. I´ve made it white but may change it to a light sepia to reflect the age of the photo. If you´d like to try this easy technique, you´ll find a tutorial HERE
I think it looked even better after I´d faded out the edges and framed it to create my own cameo.

You´ll find the original cameo, which I´ve used in the blog header and which you can also see on the right, in Shabby Chic Rooms Part 2 where, if you´d like to create your own personal cameo, you´ll also find a link to the frame and even to a room to hang it in!

Saturday, January 1, 2011

A New Year. A New Look.

I´ve only been in this room since November but I feel quite at home in it already. I´ve enjoyed keeping the Victorian doll company on the couch, drinking tea from the china cup, making calls on the antique phone and welcoming visitors. But I felt it was time for a change and a new look. Few women can resist moving their living room furniture around now and then...well, as long as someone else does the actual lifting and moving! With a virtual room it´s easy not only to move it but to replace it entirely along with its deco. It´s also a lot more fun to design a new room than to sweep and dust the old one...so here´s my brand new room furnished and decorated using Part 2 of my Shabby Chic Rooms Collection. I hope you like it. If you do, you might like to have a room of your own to display your treasured photos. You´ll find one HERE. Have fun with it!
Happy New - scrapping - Year, everyone!

Thursday, December 30, 2010

Dora´s Snow Angel

I sent Lajuana a photo recently to show her how much snow we have here in Germany while she´s basking in the Texan sunshine and she sent back this lovely LO which she created using my freebie snowflakes and Noel Nouveau. I think the doggy paw prints are a nice touch and Dora would too if she wasn´t too busy trying to wrench that stick out of my hands to notice anything! Thank you, Lajuana. At least it was sunny enough for me to need my sunglasses that day even though it was so cold I had to be muffled up to my chin and down to my eyebrows.
By the way, if you missed the Christmas presents, you´ll find them HERE

Thursday, December 23, 2010

Who Needs Snow?


It may look pretty decorating my robins Christmas card but I´ve had enough snow to last me a lifetime. In fact I´ve got so much this winter I´m giving it away so if you´re not feeling chilly enough already, get your woolly hat and mittens on and shovel it up HERE!

Monday, December 20, 2010

Pretty Peggy

When I look at this photo I wonder what prompted Peggy to dress up just to go down and sit on the harbour wall unless it was for the sole purpose of having her photo taken to display her new clothes. She´s certainly dressed in the height of late 1940´s fashion and wouldn´t look out of place in Hollywood so she must have looked quite exotic on a small island in the far north of Scotland. Look at those chunky peep toe shoes with the ankle straps! And the lacy gloves. I think her dress is beautiful and couldn´t resist adding a little colour to it and painting her lips to match as I can just imagine that dark red lipstick. (Click on the photo for a larger view.)
I´ve added some gold swirls to give her a little Hollywood bling and I had fun experimenting with the gilt-edged frosted glass frame on various backgrounds. I like the way it changes to mulberry against the dark pink to set off Peggy and her lovely dress. I love this photo of her. She looks so young and carefree and happy on that long ago summer day.

Sunday, December 19, 2010

Lerwick Cousin

This is my mother´s cousin, Margaret Peterson aka Peggy, one of the many relatives she used to visit in Lerwick, the capital of the Shetland Isles. I scanned this photo at 2400 dpi because I wanted to get enough detail to create a portrait but I´m also going to scrap the entire photo sometime as it shows so much of the fashion of the era. Even if the date - 1948 - hadn´t been written on the back, just the hair style alone would have given it away. In the full size photo you can see that she´s wearing a dress with a floral pattern which wouldn´t look out of place today.

Again, as in the earlier page of my aunt, I´ve used backgrounds and elements from the kit I´m presently working on. Couldn´t resist playing with the butterfly swirls again! At least I´ve added a bird although he´d have no trees to perch on as they don´t grow in Shetland.

Saturday, December 18, 2010

Summer Past

My mother´s older sister, Lucas, had a large collection of family photos. For many years after her death nobody knew what had become of them until my cousin, Neville, discovered them in his brother´s attic. This is one which I restored recently.


I don´t know exactly when it was taken but it must have been in the early 1930s, probably in her home town of Glasgow, and judging by the blouse and sandals my aunt is wearing, it was during the summer. I´ve given the photo an appropriate floral setting using backgrounds designed especially for it plus some jewelled insects and swirls left over from Flight Of Fancy. If they morph into a kit I think Summer Past would be an appropriate name for it.

Friday, December 10, 2010

Angelic Trio

These are some of the angels from my collection of Victorian ephemera which I´ve used as Christmas cards over the years.

I´ve also made angelic postage stamps for my Christmas card envelopes. With a little added glitter they make lovely stickers and page headers. But I´m sure you´ll come up with ideas of your own, so if you´d like them to decorate your own Christmas projects, you´ll find them HERE.
Merry Christmas, everyone!


Saturday, December 4, 2010

Cross stitch cards


Embroidery and cross stitch have always been among my favourite hobbies and I enjoy creating not only large pictures but also small greeting cards for special occasions. Here are just a few of them.

I made this mouse for a friend whose birthday is in early September. I couldn´t resist making it look 3D by using various glass beads for the blackberries.

The angel is my favourite Christmas motif. I´ve used it not only for cards but also for Christmas tree decorations. Sometimes I stitch the heart onto plastic and sometimes, as here, I make it out of Fimo.

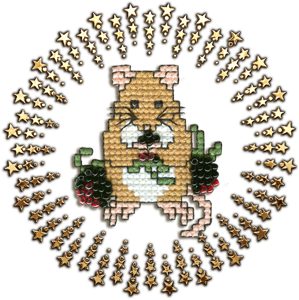
Of these three the bear is the only one I´ve kept so far. I must say he was easier to stitch than extract!
The frames are from my nostalgic Christmas kit, Noel Nouveau, which you´ll find HERE along with an early Christmas present.

Sunday, November 28, 2010

Fooling The Birds

With the first snow and winter fast approaching, I thought it time to replace the autumn garland of apples and berries on my front door. It´s made of lacquered polystyrene and looks remarkably real, so real in fact that it seems to have fooled even the birds! Not only did they peck large holes in the "apples" but they even tweaked out some of the berry twigs and scattered them on the steps. At least the wooden snow angel which replaced my nibbled garland should survive to greet another winter!


The bird pendant and frames are from my kit, Vintage Patina, which you can see HERE, and also pick up a freebie or two.


My table centrepiece, on the other hand, IS real AND edible though I don´t think the birds would enjoy those hot chilli peppers!

Saturday, November 20, 2010

After Deco-Pages

After Deco-Pages closed its doors I had nowhere to call my scrapping home until Lajuana aka scrapladyandmore offered to design a room for me to display my work until all the former DP members get back together again under one roof. Here it is at last and all thanks to Lajuana – with a little hindrance and interference from yours truly. As you can see, she also helped me to move some of my furniture and knick-knacks. At present they´re all from part 1 of my Shabby Chic Rooms Collection but the great advantage in having a virtual room is that it can be changed at whim. Since the entire collection consists of 196 items, the permutations are endless...Here´s part 1. Hope you´ll like it enough to call back again sometime to see the other 2 parts of the kit and maybe pick up a freebie or two.